×
- Hello
- Login or Register
- Quick Links
- Live Chat
- Track Order
- Parts Availability
- RMA
- Help Center
- Contact Us
- Shop for
- Volkswagen Parts
My Garage
My Account
Cart
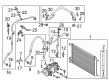
Genuine Volkswagen Golf SportWagen A/C Compressor
Air Conditioning Compressor- Select Vehicle by Model
- Select Vehicle by VIN
Select Vehicle by Model
orMake
Model
Year
Select Vehicle by VIN
For the most accurate results, select vehicle by your VIN (Vehicle Identification Number).
4 A/C Compressors found


Volkswagen Golf SportWagen Compressor Part Number: 5Q0-816-803-D
$698.44 MSRP: $880.75You Save: $182.31 (21%)Ships in 1-2 Business Days
Volkswagen Golf SportWagen Compressor Part Number: 5Q0-820-803-K
$823.49 MSRP: $1038.45You Save: $214.96 (21%)Ships in 1-2 Business Days
Volkswagen Golf SportWagen Compressor Part Number: 5Q0-820-803-N
$823.49 MSRP: $1038.45You Save: $214.96 (21%)Ships in 1-2 Business DaysVolkswagen Golf SportWagen Compressor Part Number: 5Q0-820-803-Q
$823.49 MSRP: $1038.45You Save: $214.96 (21%)Ships in 1-2 Business Days
Volkswagen Golf SportWagen A/C Compressor
Choose OEM A/C Compressor for superior quality and long-lasting durability. They match the Volkswagen's factory specifications exactly and pass strict quality control. If you plan to replace A/C Compressor on your Golf SportWagen, put OEM at the top of your list. You'll get the right fit, reliable performance, and peace of mind. We stock an extensive inventory of genuine Volkswagen Golf SportWagen parts. It is easy to find what you need. You will love our competitive prices that help you save. No more hassle with returns or guesswork. Every part includes a warranty straight from the manufacturer. Get trusted quality, strong durability, and real value today.
Volkswagen Golf SportWagen A/C Compressor Parts and Q&A
- Q: What precautions should be taken when disconnecting the battery and replacing the A/C compressor on Volkswagen Golf SportWagen?A:If the battery is disconnected, several systems must be re-learned before they will work properly. The refrigerant desiccant cartridge should be replaced whenever the compressor is replaced. Have the air conditioning system discharged. Remove the engine cover and disconnect the negative battery cable. Loosen the right front wheel bolts, then raise the vehicle on the hoist and remove the under-vehicle splash shield. Depending on the engine, it may be easier to remove the right inner fender splash shield. Remove the drivebelt and the air filter housing. On turbocharged models, it may be necessary to remove the charge air cooler pipes. Clean the compressor thoroughly around the refrigerant line fittings. Disconnect the electrical connectors from the top and back of the air conditioning compressor. Remove the compressor mounting bolts, detach the compressor from the mounting bracket, and lower it from the engine compartment. Disconnect the suction and discharge lines from the compressor, plug the open fittings to prevent the entry of dirt and moisture, and discard the seals between the plates and compressor. If a new compressor is being installed, pour the oil from the old compressor into a graduated container and add that exact amount of new refrigerant oil to the new compressor, following any directions included with it. Some replacement compressors come with refrigerant oil in them, so follow the directions regarding the draining of excess oil prior to installation. Installation is the reverse of removal; when installing the line fitting bolt to the compressor, use new seals lubricated with clean refrigerant oil and tighten the bolt securely, ensuring the alignment sleeves in the compressor bolt holes are seated correctly and the contact surfaces are clean and flat. Have the system evacuated, recharged, and leak tested by the shop that discharged it.

Related Volkswagen Golf SportWagen Parts
 Volkswagen Golf SportWagen A/C Service Cap
 Volkswagen Golf SportWagen Catalytic Converter
 Volkswagen Golf SportWagen Door Lock Switch
 Volkswagen Golf SportWagen Door Screws
 Volkswagen Golf SportWagen Fuel Tank Skid Plate
 Volkswagen Golf SportWagen Idler Pulley
 Volkswagen Golf SportWagen Parking Sensors
 Volkswagen Golf SportWagen Radiator
 Volkswagen Golf SportWagen Side View Mirrors
 Volkswagen Golf SportWagen Throttle Body Mounting Gasket
 Volkswagen Golf SportWagen Tie Rod End