×
- Hello
- Login or Register
- Quick Links
- Live Chat
- Track Order
- Parts Availability
- RMA
- Help Center
- Contact Us
- Shop for
- Volkswagen Parts
My Garage
My Account
Cart
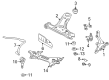
Genuine Volkswagen Cabrio Control Arm
Suspension Arm- Select Vehicle by Model
- Select Vehicle by VIN
Select Vehicle by Model
orMake
Model
Year
Select Vehicle by VIN
For the most accurate results, select vehicle by your VIN (Vehicle Identification Number).
1 Control Arm found

Volkswagen Cabrio Lower Control Arm Part Number: 1H0-407-151
$113.69 MSRP: $159.23You Save: $45.54 (29%)Ships in 1-2 Business Days
Volkswagen Cabrio Control Arm
Choose OEM Control Arm for superior quality and long-lasting durability. They match the Volkswagen's factory specifications exactly and pass strict quality control. If you plan to replace Control Arm on your Cabrio, put OEM at the top of your list. You'll get the right fit, reliable performance, and peace of mind. We stock an extensive inventory of genuine Volkswagen Cabrio parts. It is easy to find what you need. You will love our competitive prices that help you save. No more hassle with returns or guesswork. Every part includes a warranty straight from the manufacturer. Get trusted quality, strong durability, and real value today.
Volkswagen Cabrio Control Arm Parts and Q&A
- Q: What steps are required for the installation of a new control arm pivot bolt and rear mounting bolt on Volkswagen Cabrio?A:A new control arm pivot bolt and rear mounting bolt will be required on installation. Begin by chocking the rear wheels, firmly applying the parking brake, jacking up the front of the vehicle, and supporting it on axle stands before removing the appropriate front wheel. For models with Plus suspension, loosen and remove the nut (or nut and bolt, as applicable) securing the stabilizer bar connecting link to the control arm, freeing the link from the arm. For models with base suspension, remove the connecting link. Mark the correct installed position of the balljoint on the end of the control arm with a suitable marker pen, then loosen and remove the balljoint retaining bolts and lift off the retaining plate from the top of the control arm. Loosen and remove the control arm pivot bolt and rear mounting bolt, then lower the arm out of position and remove it from underneath the vehicle. Clean the control arm and the area around the arm mountings thoroughly, removing all traces of dirt and underseal if necessary, and check for cracks, distortion, or any signs of wear or damage, particularly at the pivot and rear mounting bushings. If either bushing requires replacement, take the control arm to a VW dealer or an automotive machine shop, as a hydraulic press and suitable spacers are needed to press the bushings out and install new ones. To install, maneuver the control arm into position, engaging it with the balljoint, and install the new pivot bolt and rear mounting bolt. Position the retaining plate on top of the arm, then install the control arm balljoint retaining bolts, aligning the balljoint with the previously made marks and tightening the retaining bolts to the specified torque. Tighten the control arm rear mounting bolt to the specified stage 1 torque setting, then angle-tighten it through the specified stage 2 angle, and tighten the pivot bolt lightly at this stage. For 2.0 liter (GT specification) models, install the connecting link nut (or nut and bolt, as applicable) and tighten it to the specified torque setting, while for all other models, install the connecting links. Using a floor jack, raise the control arm to simulate normal ride height, then tighten the control arm front pivot bolt first to the specified stage 1 torque setting and then through the specified stage 2 angle. Finally, install the wheel, lower the vehicle, and tighten the wheel bolts to the torque. It is advisable to have the camber angle checked and adjusted if necessary upon completion.


