×
- Hello
- Login or Register
- Quick Links
- Live Chat
- Track Order
- Parts Availability
- RMA
- Help Center
- Contact Us
- Shop for
- Volkswagen Parts
My Garage
My Account
Cart
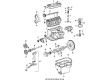
Genuine Volkswagen Transporter Flywheel
Clutch Flywheel- Select Vehicle by Model
- Select Vehicle by VIN
Select Vehicle by Model
orMake
Model
Year
Select Vehicle by VIN
For the most accurate results, select vehicle by your VIN (Vehicle Identification Number).
1 Flywheel found

Volkswagen Transporter Flywheel Part Number: 025-105-271-X
$162.75 MSRP: $225.00You Save: $62.25 (28%)
Volkswagen Transporter Flywheel
Choose OEM Flywheel for superior quality and long-lasting durability. They match the Volkswagen's factory specifications exactly and pass strict quality control. If you plan to replace Flywheel on your Transporter, put OEM at the top of your list. You'll get the right fit, reliable performance, and peace of mind. We stock an extensive inventory of genuine Volkswagen Transporter parts. It is easy to find what you need. You will love our competitive prices that help you save. No more hassle with returns or guesswork. Every part includes a warranty straight from the manufacturer. Get trusted quality, strong durability, and real value today.
Volkswagen Transporter Flywheel Parts and Q&A
- Q: How can the flywheel be removed after the engine is taken out on Volkswagen Transporter?A:The flywheel could be removed after the clutch cover is removed with the engine out of the car. The flywheel is fitted with one center bolt that is tightened to 253 ft/lbs, so it is required to use a piece of angle iron to lock the flywheel by fitting it across two of the clutch bolts that are refitted into the flywheel. When working alone the other end of the angle iron may be held in a vice with the engine on the bench. The longest socket handle of the socket set should be employed with a 36 mm socket and an item of steel pipe may be inserted over the socket handle in order to provide leverage. Once the bolt is loosened, pull it off with the large washer using a mark that can be identified in the flywheel hub to be put back. One should always remember not to turn the flywheel before marking a corresponding point on the crankshaft flange in order to have the right balance. The flywheel is clamped with four dowel pegs which fit into holes on the flywheel boss and the crankshaft flange. To remove it, place a piece of wood under the edge of the teeth of the starter of the flywheel and with a soft mallet or block of wood, strike at the edges of the starter, but do not take leverage against the crankcase or the latter will be damaged. When free release, maintain the flywheel and eliminate the gasket above dowel pegs, and form the second line up mark on the crankshaft. The dowel pegs should fit in snugly; a loose fit will create a potential risk of the flywheel loosening and a new flywheel may have to be obtained in the occurrence of oval holes. Also check the starter teeth, machined into the flywheel, but in case of wear, not more than 2 mm can be machined away on the clutch side, then the teeth can be chamfered and de-burred. The last thing to do is to check the land on the flywheel boss where the oil seal is located, as it may have severe ridging and need to be lathed.


