×
- Hello
- Login or Register
- Quick Links
- Live Chat
- Track Order
- Parts Availability
- RMA
- Help Center
- Contact Us
- Shop for
- Volkswagen Parts
My Garage
My Account
Cart
Genuine Volkswagen Cabrio Brake Booster
Brake Power Booster- Select Vehicle by Model
- Select Vehicle by VIN
Select Vehicle by Model
orMake
Model
Year
Select Vehicle by VIN
For the most accurate results, select vehicle by your VIN (Vehicle Identification Number).
1 Brake Booster found

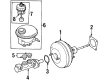
Volkswagen Cabrio Brake Booster Part Number: 1H1-612-107-D
$296.90 MSRP: $405.60You Save: $108.70 (27%)Ships in 1-2 Business Days
Volkswagen Cabrio Brake Booster
Choose OEM Brake Booster for superior quality and long-lasting durability. They match the Volkswagen's factory specifications exactly and pass strict quality control. If you plan to replace Brake Booster on your Cabrio, put OEM at the top of your list. You'll get the right fit, reliable performance, and peace of mind. We stock an extensive inventory of genuine Volkswagen Cabrio parts. It is easy to find what you need. You will love our competitive prices that help you save. No more hassle with returns or guesswork. Every part includes a warranty straight from the manufacturer. Get trusted quality, strong durability, and real value today.
Volkswagen Cabrio Brake Booster Parts and Q&A
- Q: How to test and replace the brake booster unit on Volkswagen Cabrio?A:To test the operation of the booster, depress the brake pedal several times to exhaust the vacuum, then start the engine while keeping the pedal firmly depressed; there should be a noticeable "give" in the brake pedal as the vacuum builds up. Allow the engine to run for at least two minutes, then switch it off. If the brake pedal is now depressed, it should feel normal, but further applications should result in the pedal feeling firmer, with the pedal stroke decreasing with each application. If the booster does not operate, first inspect the booster unit check valve, and on diesel models, also check the operation of the Vacuum Pump. If the booster unit still fails to operate satisfactorily, the fault lies within the unit itself, and if faulty, the booster unit must be replaced. For removal, on models equipped with ABS, the power brake booster cannot be removed without first removing the ABS hydraulic unit, so this process should be left to a qualified repair shop. Begin by removing the master cylinder, then on models with a manual transaxle, remove the clutch master cylinder. Next, remove the heat shield (if equipped) from the front of the booster and carefully ease the vacuum hose out from the booster unit sealing grommet. From inside the vehicle, remove the brake light switch, unscrew the four retaining nuts securing the booster unit to the pedal mounting bracket, and then maneuver the booster unit out of position, noting the gasket installed on the rear of the unit. Detach its pushrod ball from the brake pedal spring clip as the booster is withdrawn. For installation, check the booster unit vacuum hose sealing grommet for signs of damage or deterioration and replace it if necessary. Install a new gasket on the rear of the booster unit, then reposition the unit in the engine compartment. From inside the vehicle, ensure that the booster unit pushrod is correctly engaged with the brake pedal, clip the pedal onto the pushrod ball, and check that the pedal is securely retained before installing and tightening the booster unit mounting nuts to the specified torque. Carefully ease the vacuum hose back into position in the booster, taking care not to displace the sealing grommet, and where necessary, install the heat shield to the booster. Finally, install the master cylinder and the brake light switch, and upon completion, start the engine to check for air leaks at the vacuum hose-to-booster unit connection and verify the operation of the braking system.


