×
- Hello
- Login or Register
- Quick Links
- Live Chat
- Track Order
- Parts Availability
- RMA
- Help Center
- Contact Us
- Shop for
- Volkswagen Parts
My Garage
My Account
Cart
Genuine Volkswagen Cabrio Exhaust Manifold
Engine Exhaust Manifold- Select Vehicle by Model
- Select Vehicle by VIN
Select Vehicle by Model
orMake
Model
Year
Select Vehicle by VIN
For the most accurate results, select vehicle by your VIN (Vehicle Identification Number).
3 Exhaust Manifolds found

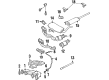
Volkswagen Cabrio Exhaust Manifold Part Number: 037-253-031-CB
$306.13 MSRP: $418.22You Save: $112.09 (27%)Ships in 1-2 Business Days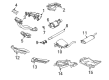
Volkswagen Cabrio Exhaust Manifold Part Number: 037-253-031-CC
$516.06 MSRP: $705.00You Save: $188.94 (27%)Ships in 1-2 Business Days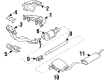
Volkswagen Cabrio Manifold Part Number: 037-253-031-BP
$541.68 MSRP: $740.00You Save: $198.32 (27%)
Volkswagen Cabrio Exhaust Manifold
Choose OEM Exhaust Manifold for superior quality and long-lasting durability. They match the Volkswagen's factory specifications exactly and pass strict quality control. If you plan to replace Exhaust Manifold on your Cabrio, put OEM at the top of your list. You'll get the right fit, reliable performance, and peace of mind. We stock an extensive inventory of genuine Volkswagen Cabrio parts. It is easy to find what you need. You will love our competitive prices that help you save. No more hassle with returns or guesswork. Every part includes a warranty straight from the manufacturer. Get trusted quality, strong durability, and real value today.
Volkswagen Cabrio Exhaust Manifold Parts and Q&A
- Q: How to remove and reinstall Cylinder Head, Exhaust Manifold and Intake Manifold on Volkswagen Cabrio?A:In order to take out the engine, you have to begin by parking the car on a flat surface with sufficient space to work with. Unscrew the hood and take out the battery negative cable, making sure that the anti-theft code of the stereo is at hand where appropriate. Empty the engine and cooling system and then take off the drivebelt(s) and position the engine at TDC on cylinder number 1. Unconnect radiator hoses, expansion tank hose and heater coolant hoses to the cylinder head. Even though it is not necessary, the lock carrier panel assembly can be removed to enhance engine access. Loose and disconnect injector fuel supply hoses, injector bleed hose, all electric cabling of the fuel system by labeling and unplugging and reconnecting to be reassembled later. Take off camshaft cover, Timing Belt outer covers and timeline belt off the camshaft sprocket followed by the timing Belt Tensioner, camshaft sprocket and the fuel injection pump sprocket. Release and remove the inner covers of the timing belt, disconnect the wiring plug of the coolant sensor, and loosen and remove the exhaust downpipe of the exhaust manifold flange. Where necessary, disassemble the turbocharger, and EGR valve together with connecting pipework. Slack the supply cable out of the glow plug in the cylinder No. 4, remove the engine harness connector bracket off the cylinder head and gradually loosen the cylinder head bolts until they become disengaged, and the old bolts are discarded. Before removing it out of the cylinder block, ensure that nothing is attached to the cylinder head and it may require help as it is heavy. Take the gasket off the top of the block, taking notice of the locating dowels, and put in their place in a safe way when loose. In case of overhauling the cylinder head, put looseness and remove securing bolts on intake manifold, pull away, and salvage the gasket. Firstly, unbolt the heat shield and the nuts in the exhaust manifold then pull up the manifold and salvage the gaskets. Wipe the mating surfaces of the intake and exhaust manifolds wipe off and replace the exhaust manifold with new gaskets and place the exhaust manifold correctly. Install the heat shield, screw the retaining nuts and then install another intake manifold gasket on the cylinder head and then put the intake manifold in place and screw tight with retaining bolts to the recommended tightening. The mating faces of the cylinder head and block/crankcase should be free before refitting; scraper should be used to clean off any gasket and carbon residue and care should be taken not to damage the aluminum alloy. Close the water, oil and bolt holes in the cylinder block/crankcase to avoid contamination. Inspect mating surfaces to check whether there are any damage on the mating surfaces and deal with small imperfections using abrasive papers. In case it is suspected of warping, a straight-edge should be used to examine whether it is warped. Empty the drillings of cylinder head bolts, and, in case there is no tap, make a substitute of an old cylinder head bolt. To avoid the damage of the valve heads, make sure that the crankshaft is installed in such a way that the pistons are halfway down their bores before reattaching the cylinder head. Look all over the old cylinder head gasket to see what the identification markings are and whether the new gasket is identical to the old one unless the new pistons are fitted. In case of new piston assemblies, then check the piston projection and then buy a new gasket. Place the new head gasket on the block of the cylinder making sure it is correctly oriented with the locating dowels and also face up. To facilitate installation, cut alignment dowels using two used cylinder head bolts, then fit the cylinder head and manifolds in the middle of the block, and ensure the gasket seating before putting on the entire weight. Remove home made dowels and grease the threads and lower part of the new cylinder head bolts. Apply oil to the threads of the bolts and fit all the bolts until hand tight. Lastly, screw the cylinder head bolts in the given order up to Stage 1 torque level and then do the same with Stage 2 torque level.


