×
- Hello
- Login or Register
- Quick Links
- Live Chat
- Track Order
- Parts Availability
- RMA
- Help Center
- Contact Us
- Shop for
- Volkswagen Parts
My Garage
My Account
Cart
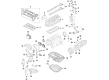
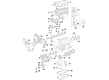
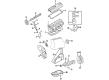
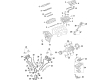
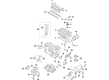
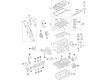
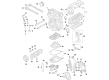
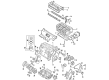
Genuine Volkswagen Harmonic Balancer
Engine Harmonic Balancer- Select Vehicle by Model
- Select Vehicle by VIN
Select Vehicle by Model
orMake
Model
Year
Select Vehicle by VIN
For the most accurate results, select vehicle by your VIN (Vehicle Identification Number).
47 Harmonic Balancers found

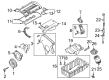
Volkswagen Vibration Damper Part Number: 04C-105-243-D
$141.60 MSRP: $198.32You Save: $56.72 (29%)Ships in 1-2 Business DaysProduct Specifications- Other Name: Damper

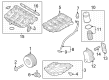
Volkswagen Damper Part Number: 7B0-105-251-A
$181.14 MSRP: $253.69You Save: $72.55 (29%)Ships in 1-2 Business DaysProduct Specifications- Other Name: Crankshaft Damper

Volkswagen Crankshaft Pulley Part Number: 027-105-243
$161.88 MSRP: $226.72You Save: $64.84 (29%)Product Specifications- Other Name: Pulley; Damper & Pulley

Volkswagen Vibration Damper Part Number: 7B0-105-251-D
$171.75 MSRP: $240.55You Save: $68.80 (29%)Ships in 1-2 Business DaysProduct Specifications- Other Name: Damper; Crankshaft Damper
- Replaces: 7B0-105-251-B, 7B0-105-251-C

Volkswagen Damper Part Number: 06B-109-477-A
$198.72 MSRP: $278.31You Save: $79.59 (29%)Ships in 1-2 Business DaysProduct Specifications- Other Name: Belt Damper

Volkswagen Vibration Damper Part Number: 06H-105-243-Q
$198.72 MSRP: $278.31You Save: $79.59 (29%)Ships in 1-2 Business DaysProduct Specifications- Other Name: Damper
- Replaces: 06K-105-243, 06H-105-243-F, 06H-105-243-K, 06K-105-243-D, 06H-105-243-G, 06H-105-243-M

Volkswagen Vibration Damper Part Number: 04E-105-243-K
$210.62 MSRP: $294.98You Save: $84.36 (29%)Ships in 1-2 Business DaysProduct Specifications- Other Name: Damper
- Replaces: 04E-105-243-A

Volkswagen Pulley Part Number: 03G-105-243-B
$226.10 MSRP: $316.67You Save: $90.57 (29%)Ships in 1-2 Business DaysProduct Specifications- Other Name: Damper; Vibration Damper


Volkswagen Pulley Part Number: 04L-105-243
$159.54 MSRP: $223.44You Save: $63.90 (29%)Ships in 1-2 Business DaysProduct Specifications- Other Name: Damper; Vibration Damper
- Replaces: 03G-105-243

Volkswagen Damper Part Number: 058-198-479-A
$235.62 MSRP: $330.00You Save: $94.38 (29%)Ships in 1-2 Business DaysProduct Specifications- Other Name: Repair Kit

Volkswagen Vibration Damper Part Number: 7B0-105-251
$382.18 MSRP: $523.81You Save: $141.63 (28%)Ships in 1-2 Business DaysProduct Specifications- Other Name: Damper; Crankshaft Damper

Volkswagen Pulley Part Number: 038-105-243-K
$248.88 MSRP: $340.00You Save: $91.12 (27%)Ships in 1-2 Business DaysProduct Specifications- Other Name: Damper; Vibration Damper

Volkswagen Vibration Damper Part Number: 03H-105-243-N
$253.76 MSRP: $346.67You Save: $92.91 (27%)Ships in 1-2 Business DaysProduct Specifications- Other Name: Damper

Volkswagen Pulley Part Number: 03H-105-243-P
$266.55 MSRP: $364.14You Save: $97.59 (27%)Ships in 1-2 Business DaysProduct Specifications- Other Name: Damper; Vibration Damper

Volkswagen Vibration Damper Part Number: 038-105-243-M
$262.29 MSRP: $358.31You Save: $96.02 (27%)Ships in 1-2 Business DaysProduct Specifications- Other Name: Damper

Volkswagen Pulley Part Number: 06H-105-243-K
$198.72 MSRP: $278.31You Save: $79.59 (29%)Ships in 1-2 Business DaysProduct Specifications- Other Name: Damper; Vibration Damper
- Replaced by: 06H-105-243-Q


Volkswagen Vibration Damper Part Number: 06H-105-243-M
$198.72 MSRP: $278.31You Save: $79.59 (29%)Ships in 1-2 Business DaysProduct Specifications- Other Name: Damper
- Replaced by: 06H-105-243-Q

Volkswagen Pulley Part Number: 022-105-243
$311.10 MSRP: $425.00You Save: $113.90 (27%)Ships in 1-2 Business DaysProduct Specifications- Other Name: Damper; Vibration Damper

Volkswagen Pulley Part Number: 06A-105-243-E
$317.19 MSRP: $433.32You Save: $116.13 (27%)Ships in 1-2 Business DaysProduct Specifications- Other Name: Damper; Vibration Damper
- Replaces: 06B-105-243-F
Volkswagen Vibration Damper Part Number: 021-105-243-J
$317.20 MSRP: $433.33You Save: $116.13 (27%)Ships in 1-2 Business DaysProduct Specifications- Other Name: Damper
| Page 1 of 3 |Next >
1-20 of 47 Results
Volkswagen Harmonic Balancer
Volkswagen Harmonic Balancer keeps the crankshaft of every engine running smoothly by soaking up vibration and guarding against damaging twist, giving drivers a quiet ride and longer lasting parts. The brand began in Wolfsburg with a dream of a reliable people car and that spirit still lives in modern VW models that mix clean style, sturdy build, and clever tech like TSI turbo engines, direct fuel injection, digital cockpits, and park assist that make daily driving easy and fun. The brand's MQB platform lets many body styles share parts, cutting weight and cost while keeping road manners sharp, and the new ID series shows how the brand is pushing into electric power without losing the familiar solid feel that fans trust. Because the crankshaft is the heart of any engine, the Harmonic Balancer uses a metal hub, a dense rubber layer, and a weighted ring to cancel out the pulses created with each ignition stroke, which keeps belts tracking true and reduces cabin noise across the entire VW lineup. This smart device also helps maintain proper timing for components, boosting fuel efficiency and protecting internal parts from premature wear, so whether you drive a classic Beetle, a versatile van, or a future ID electric car, you benefit from the same balanced smoothness that defines every VW.
Buying OEM parts is a smart move to keep your long-term repair costs low. These components are built to last because VW uses such strict factory standards. At VWPartsGiant.com, it is easy to find genuine Volkswagen Harmonic Balancer at prices that actually beat the competition. You get a real manufacturer's warranty with every single part, so you know your purchase is safe. Plus, forget about return headaches since our policy is easy and worry-free. We ship your order fast, too. If you have questions, our team of parts experts is ready to help. Why wait? Start shopping now!
Volkswagen Harmonic Balancer Parts and Q&A
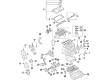
- Q: What precautions should be taken when removing the harmonic balancer to avoid severe engine damage on Volkswagen Jetta?A:In all models there is a possibility of severe damage to the engines, or even a variation in the valve timing with the removal of the crankshaft pulley when the crankshaft is not in the TDC position. Start with loosening the right-front wheel bolts, raising the front of the car, and placing it on jackstands and holding it firm with wheel blocks at the other end before taking the right-front wheel off. Then take off the splash shield, engine, engine cover and the right-front inner fender liner. Take away the drivebelts and turn the engine clockwise until the No. 1 cylinder has reached TDC. In case of 1.4L models, ensure that the crankshaft pulley does not turn with a special tool and loosen the crankshaft pulley bolt after which teeth on the pulley and crankshaft sprocket can be checked to be worn out. Install the new pulley with the retaining bolt by attaching it lightly with oil and ensuring that it is tightened to the set amount and finish the installation process in the reverse order. In the case of 2.0L, keep the crankshaft in place using a wrench on the center bolt, unscrew the pulley bolts, remove the pulley off the crankshaft sprocket and make sure to get a replacement center bolt in case it was removed. Install the new crankshaft drive sprocket bolt to the required torque and angle of rotation, locate the crankshaft pulley on the crankshaft drive sprocker, align the mounting holes and fit the pulley retaining fasteners and tighten them to the required torque. In the case of timing chain engines, disconnect the electric connector to the windshield washer reservoir and the screws to dismount the reservoir. To remove the hose in particular models, disassemble the air charge pipe that has fasteners and loosen the hose clamps. Rotate the engine clockwise and make sure that the No. 1 cylinder is at TDC and then ensure that the crankshaft pulley does not rotate and loosen the crankshaft pulley bolt. Take out two bolts in the lower timing chain cover, insert a special tool on the crankshaft pulley, and timing cover, and mounting bolts through the tool, into the holes in the crankshaft pulley. Take off all the crankshaft pulley bolt, verify the outer sleeve of the special tool, and insert the tensioning pin in the crankshaft. After securing clamp the knurled knobs of the special tool with a screwdriver and remove the tool as an assembly with the crankshaft pulley attached. Install the crankshaft pulley with the tensioning pin in place and make sure that it fits with the tooth contours and slide one of the special tools on the tensioning pin to check alignment. Loosely screw a lock nut and tighten it checking the seating of the vibration damper and then fit the special tool on the crankshaft pulley and timing cover. Take the tension pin out, insert a new pulley retaining bolt with O-ring hand tight, and when the crankshaft pulley bolt is tight, take off the special tool. Lastly, do not allow the crankshaft pulley to rotate and screw in the crankshaft bolt to the recommended torque and fit the new lower timing chain cover bolts and reverse the procedure.
- Q: How to remove and install the harmonic balancer and related components on Volkswagen Rabbit?A:Unscrew the bolts of the right front wheel, lift the front of the car and ensure it is kept on jackstands. Close the opposite end of the wheels and take off the right front wheel. Laying under the vehicle, take out the lower splash shield beneath the engine. Removing the engine cover This is done from above in the engine compartment. Take off the right front interior fender liner and the drivebelts. Turn the engine in the way it is normally rotated (clockwise) until the No. 1 cylinder is at TDC. To remove the crankshaft pulley, position the crankshaft without moving it out of the TDC position to hold it with a wrench on the center bolt and unscrew the pulley bolts and remove the pulley off the crankshaft sprocket. In case the center bolt was taken out, make sure to wrench the new crankshaft drive sprocket bolt to the required torque and rotation angle. Install crankshaft pulley on the crankshaft drive sprocket and align the mounting holes and set the pulley retaining fasteners and tighten them to the recommended torque. The rest of the installation process is the opposite of uninstalling. In the case of timing chain engines, disconnect the air charge pipe, with the clamps at each end and the air charge pipe. Unscrew both the hose clamps on the lower air charge hose and loosen the hose. Turn the engine in the way it is normally rotated (clockwise) until the No. 1 cylinder is at TDC. Install VW special tool #T10355 (or equivalent) to prevent the crankshaft pulley movement and remove the crankshaft pulley bolt, without ensuring the crankshaft is not moved out of the TDC position. Install crankshaft pulley to crankshaft and be sure that both flats of the tooth contours are in line with the tooth contours on end of crankshaft. Install a new O-ring and pulley retaining bolt attaching the bolt with the correct amount of torque. The rest of the installation process is the opposite of uninstalling.


Related Volkswagen Parts
 Volkswagen Air Filter
 Volkswagen PCV Valve
 Volkswagen Vacuum Pump
 Volkswagen Spark Plug
 Volkswagen ABS Reluctor Ring
 Volkswagen Automatic Transmission Oil Cooler
 Volkswagen Cooling Fan Motor
 Volkswagen Fuel Tank Skid Plate
 Volkswagen HVAC Heater Blend Door Actuator
 Volkswagen Rack and Pinions
 Volkswagen Timing Chain Guide
 Volkswagen Voltage Regulators
Browse by Model
Arteon Harmonic Balancer Atlas Cross Sport Harmonic Balancer Atlas Harmonic Balancer Beetle Harmonic Balancer Cabrio Harmonic Balancer Cabriolet Harmonic Balancer CC Harmonic Balancer Corrado Harmonic Balancer Eos Harmonic Balancer EuroVan Harmonic Balancer Fox Harmonic Balancer Golf Alltrack Harmonic Balancer Golf Harmonic Balancer Golf R Harmonic Balancer Golf SportWagen Harmonic Balancer GTI Harmonic Balancer Jetta Harmonic Balancer Passat Harmonic Balancer Phaeton Harmonic Balancer R32 Harmonic Balancer Rabbit Harmonic Balancer Routan Harmonic Balancer Scirocco Harmonic Balancer Taos Harmonic Balancer Tiguan Harmonic Balancer Tiguan Limited Harmonic Balancer Touareg Harmonic Balancer Vanagon Harmonic Balancer