×
- Hello
- Login or Register
- Quick Links
- Live Chat
- Track Order
- Parts Availability
- RMA
- Help Center
- Contact Us
- Shop for
- Volkswagen Parts
My Garage
My Account
Cart
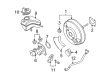
Genuine Volkswagen Rabbit Brake Booster
Brake Power Booster- Select Vehicle by Model
- Select Vehicle by VIN
Select Vehicle by Model
orMake
Model
Year
Select Vehicle by VIN
For the most accurate results, select vehicle by your VIN (Vehicle Identification Number).
1 Brake Booster found

Volkswagen Rabbit Brake Booster Part Number: 1K1-614-106-AB
$338.54 MSRP: $462.49You Save: $123.95 (27%)Ships in 1-2 Business Days
Volkswagen Rabbit Brake Booster
Choose OEM Brake Booster for superior quality and long-lasting durability. They match the Volkswagen's factory specifications exactly and pass strict quality control. If you plan to replace Brake Booster on your Rabbit, put OEM at the top of your list. You'll get the right fit, reliable performance, and peace of mind. We stock an extensive inventory of genuine Volkswagen Rabbit parts. It is easy to find what you need. You will love our competitive prices that help you save. No more hassle with returns or guesswork. Every part includes a warranty straight from the manufacturer. Get trusted quality, strong durability, and real value today.
Volkswagen Rabbit Brake Booster Parts and Q&A
- Q: What precautions should be taken when disconnecting the battery and servicing the power brake booster on Volkswagen Rabbit?A:If the battery is disconnected, several systems must be re-learned before they will work properly. On some models equipped with an automatic transaxle, a Vacuum Pump supplies vacuum to the power brake booster in addition to manifold vacuum, mounted near the ABS/ESP hydraulic unit with a vacuum hose routed to the brake booster. Vehicles equipped with a brake booster vacuum pump require diagnosis by a dealer service department if the system appears to be defective. The power brake booster is not serviceable; replace it with a new or rebuilt unit if it's defective. The master cylinder is removed along with the power brake booster as an assembly and they are separated after removal. For an operating check, depress the brake pedal several times with the engine off to ensure there's no change in the pedal reserve distance, then depress the pedal and start the engine; if the pedal goes down slightly, operation is normal. For an airtightness check, start the engine and turn it off after one or two minutes, then depress the brake pedal slowly several times; if the pedal depresses less each time, the booster is airtight. Depress the brake pedal while the engine is running, then stop the engine with the pedal depressed; if there's no change in the pedal reserve travel after holding the pedal for 30 seconds, the booster is airtight. Brake fluid will damage paint or finished surfaces. With the engine off, press the brake pedal several times to remove any stored vacuum in the power brake booster, then remove the engine cover, disconnect the cable from the negative battery terminal, and remove the battery and battery tray. Remove the driver's side knee bolster, and for models produced on or before 11/2005, remove the brake light switch. Detach the booster pushrod from the brake pedal using a tool fabricated from a modified exhaust clamp to push on the plastic retaining lugs. Working inside the engine compartment, remove the master cylinder, then remove the vacuum hose from the brake booster and disconnect the brake booster vacuum sensor electrical connector, if equipped; if the booster is being replaced, pull the vacuum sensor from the booster and install it on the new booster. For models equipped with manual transaxles, remove the shift cables and bracket; for those with automatic transaxles, clamp off and disconnect the transaxle cooler line. Working inside the vehicle, remove the lower trim panel and the booster mounting nuts to detach the brake booster from the firewall, then carefully remove the booster from the cowl compartment and separate the master cylinder from the booster. For installation, assemble the master cylinder to the power brake booster, ensuring to match the pushrod to the master cylinder correctly during assembly. The remainder of the installation procedures are essentially the reverse of removal, tightening all mounting fasteners to the torque values. To bleed the master cylinder on the vehicle, have an assistant pump the brake pedal several times slowly, then hold the pedal to the floor; loosen the line fittings one at a time to allow air and fluid to escape, repeating this procedure on both fittings until the fluid is clear of air bubbles. Have plenty of rags on hand to catch the fluid as brake fluid will ruin painted surfaces. Finally, bleed the brake system and test the operation of the brakes before putting the vehicle into normal service, noting that the clutch system will also need bleeding after the brake system has been bled.


