×
- Hello
- Login or Register
- Quick Links
- Live Chat
- Track Order
- Parts Availability
- RMA
- Help Center
- Contact Us
- Shop for
- Volkswagen Parts
My Garage
My Account
Cart
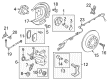
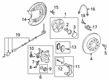
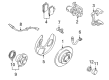
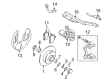
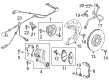
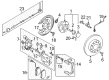
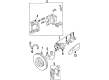
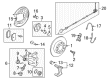
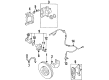
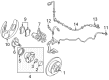
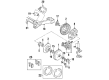
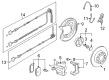
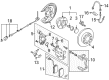
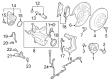
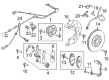
Genuine Volkswagen Brake Pad Set
Disc Brake Pad Set- Select Vehicle by Model
- Select Vehicle by VIN
Select Vehicle by Model
orMake
Model
Year
Select Vehicle by VIN
For the most accurate results, select vehicle by your VIN (Vehicle Identification Number).
87 Brake Pad Sets found

Volkswagen Brake Pads Part Number: 5C0-698-451-D
$32.36 MSRP: $41.50You Save: $9.14 (23%)Ships in 1-2 Business DaysProduct Specifications- Other Name: Brake Lining; Brake Pad, Rear Pad
- Replaces: 5C0-698-451-C, 5Q0-698-451-E, 5C0-698-451, 5C0-698-451-A, 5C0-698-451-B

Volkswagen Brake Pads Part Number: 7N0-698-451-B
$40.34 MSRP: $51.73You Save: $11.39 (23%)Ships in 1-2 Business DaysProduct Specifications- Other Name: Brake Lining; Brake Pad, Rear Pad

Volkswagen Brake Pads Part Number: 1J0-698-451-K
$50.40 MSRP: $64.62You Save: $14.22 (23%)Ships in 1-2 Business DaysProduct Specifications- Other Name: Brake Lining; Brake Pad, Rear Pad
- Replaces: 1J0-698-451-C, 1J0-698-451-G

Volkswagen Brake Pads Part Number: 1E0-698-451-G
$57.76 MSRP: $74.05You Save: $16.29 (22%)Ships in 1-2 Business DaysProduct Specifications- Other Name: Brake Lining; Brake Pad
- Replaces: 1E0-698-451, 1E0-698-451-D


Volkswagen Brake Pads Part Number: 5Q0-698-451-AF
$89.24 MSRP: $115.37You Save: $26.13 (23%)Ships in 1-2 Business DaysProduct Specifications- Other Name: Brake Lining; Brake Pad, Rear Pad
- Replaced by: 5QM-698-451-A

Volkswagen Brake Pads Part Number: 7N0-698-451-A
$59.90 MSRP: $76.81You Save: $16.91 (23%)Ships in 1-2 Business DaysProduct Specifications- Other Name: Brake Lining; Brake Pad, Rear Pad
- Replaces: 5Q0-698-451-B, 8U0-698-451-F

Volkswagen Brake Pads Part Number: 3AA-698-451-B
$63.06 MSRP: $81.52You Save: $18.46 (23%)Ships in 1-2 Business DaysProduct Specifications- Other Name: Brake Lining; Brake Pad, Rear Pad
- Replaces: 3AA-698-451-A, 3C0-698-451-F, 3AA-698-451, 3C0-698-451, 3C0-698-451-B, 5N0-698-451, 3C0-698-451-E, 3C0-698-451-D
Volkswagen Brake Pads Part Number: 7N0-698-451-D
$72.58 MSRP: $93.83You Save: $21.25 (23%)Ships in 1-2 Business DaysProduct Specifications- Other Name: Brake Lining; Brake Pad, Rear Pad

Volkswagen Brake Pads Part Number: 1H0-698-151-A
$66.22 MSRP: $85.62You Save: $19.40 (23%)Ships in 1-2 Business DaysProduct Specifications- Other Name: Brake Lining; Brake Pad

Volkswagen Brake Pads Part Number: 5Q0-698-151-M
$73.52 MSRP: $95.05You Save: $21.53 (23%)Ships in 1-2 Business DaysProduct Specifications- Other Name: Brake Lining; Brake Pad, Front Pad, Rear Pad
- Replaces: 5QD-698-151

Volkswagen Brake Pads Part Number: 1K0-698-451-P
$78.02 MSRP: $100.86You Save: $22.84 (23%)Ships in 1-2 Business DaysProduct Specifications- Other Name: Brake Lining; Brake Pad, Rear Pad
- Replaces: 1K0-698-451-D, 1K0-698-451-G
Volkswagen Brake Pads Part Number: 1HM-698-151-A
$79.72 MSRP: $103.06You Save: $23.34 (23%)Ships in 1-2 Business DaysProduct Specifications- Other Name: Brake Lining; Brake Pad
- Replaces: 1HM-698-151, 357-698-151-A

Volkswagen Brake Pads Part Number: 1J0-698-151-J
$80.91 MSRP: $104.60You Save: $23.69 (23%)Ships in 1-2 Business DaysProduct Specifications- Other Name: Brake Lining; Brake Pad, Front Pad
- Replaces: 1J0-698-151-B

Volkswagen Brake Pads Part Number: 1J0-698-151-P
$89.24 MSRP: $115.37You Save: $26.13 (23%)Ships in 1-2 Business DaysProduct Specifications- Other Name: Brake Lining; Brake Pad, Front Pad
- Replaces: 1J0-698-151-E, 1J0-698-151-G

Volkswagen Brake Pads Part Number: 1K0-698-451-H
$80.91 MSRP: $104.60You Save: $23.69 (23%)Ships in 1-2 Business DaysProduct Specifications- Other Name: Brake Lining; Brake Pad, Rear Pad

Volkswagen Brake Pads Part Number: 3C0-698-451-G
$89.24 MSRP: $115.37You Save: $26.13 (23%)Ships in 1-2 Business DaysProduct Specifications- Other Name: Brake Lining; Brake Pad, Rear Pad
- Replaces: 3C0-698-451-A, 3C0-698-451-C

Volkswagen Brake Pads Part Number: 3Q0-698-451-L
$89.24 MSRP: $115.37You Save: $26.13 (23%)Ships in 1-2 Business DaysProduct Specifications- Other Name: Brake Lining; Brake Pad, Rear Pad
- Replaces: 3Q0-698-451-C, 3Q0-698-451-B
Volkswagen Brake Pads Part Number: 3Q0-698-451-M
$80.91 MSRP: $104.60You Save: $23.69 (23%)Ships in 1-2 Business DaysProduct Specifications- Other Name: Brake Lining; Brake Pad, Rear Pad
- Replaces: 3Q0-698-451-D

Volkswagen Brake Pads Part Number: 3Q0-698-451-N
$80.91 MSRP: $104.60You Save: $23.69 (23%)Ships in 1-2 Business DaysProduct Specifications- Other Name: Brake Lining; Brake Pad, Rear Pad
- Replaces: 3Q0-698-451-E


Volkswagen Rear Pads Part Number: 1J0-698-451-N
Product Specifications- Other Name: Brake Lining; Rear Pad
- Position: Rear
| Page 1 of 5 |Next >
1-20 of 87 Results
Volkswagen Brake Pad Set
The Volkswagen Brake Pad Set is the answer to the crucial friction that transforms motion into a certain stop, making every journey safe and confident. Since 1937, VW has been striving to provide drivers with a reliable people car, a mission first demonstrated by the beloved Beetle and later the versatile Type 2 van. Today, the brand combines clean styling with rock-solid engineering, packing TSI turbo engines, direct fuel injection, digital cockpits, and park assist into the many models while the modular MQB platform reduces weight and cost. Electric ambitions are on display with the ID.3 and ID.4, and touchscreen MIB infotainment, plus head-up displays, demonstrate how VW keeps technology friendly and intuitive, allowing VW owners to enjoy a little of both tradition and innovation on every road. Matching that more widespread commitment to safety and usability, the Brake Pad Set is constructed with a sturdy steel backing plate bonded to advanced friction material that remains stable even when temperatures spike toward 400 degrees Fahrenheit. Two pads per wheel embrace the rotor the moment a driver hits the pedal, transforming kinetic energy into heat and shortening stopping distance without any fuss. Integrated wear sensors or sound cues provide an early warning of replacement time, saving rotors and wallets alike. By offering ceramic, semi-metallic, and organic blends, this Brake Pad Set allows drivers to select quiet comfort, heavy-duty endurance, or low dust cleanliness while still providing the consistent braking feel expected throughout the entire lineup.
Buying OEM parts is a smart move to keep your long-term repair costs low. These components are built to last because VW uses such strict factory standards. At VWPartsGiant.com, it is easy to find genuine Volkswagen Brake Pad Set at prices that actually beat the competition. You get a real manufacturer's warranty with every single part, so you know your purchase is safe. Plus, forget about return headaches since our policy is easy and worry-free. We ship your order fast, too. If you have questions, our team of parts experts is ready to help. Why wait? Start shopping now!
Volkswagen Brake Pad Set Parts and Q&A
- Q: What precautions should be taken when replacing the front brake pad set and removing the brake caliper on Volkswagen Passat?A:Do not press the brake pedal when the caliper is taken out. The first step to follow is to take out the cap in the brake fluid reservoir and it will take only a little over two thirds of the fluid which is then replaced with the cap again making sure that the spilled brake fluid is immediately washed away using clean cold water so as to avoid paint damages. Unscrew the bolts of the front wheel, elevate the front part of the car, and hold it firm on jackstands and block the wheels on the other end. Take the wheels off, one brake assembly at a time and wipe out the caliper and disc with brake system cleaner and allow to dry placing a drain pan underneath to receive any run off. Models which have Teves/Ate calipers, Unclipping the pad retaining spring, eliminating it, and exposing the caliper guide pins requires removal of the end caps on guide bushings. Remember to remove the caliper guide pins, pull the caliper off the mounting bracket and tie it to the suspension strut, to ensure that it is not hanging on its own off the flexible brake hose. Unscrew the inner pad of the caliper piston and take off outer pad of the mounting bracket. On any model using Lucas calipers, tighten the caliper mounting bolts every time they are removed, make the upper mounting bolts and lower mounting bolts unscrewed, and suspend the caliper on the coil spring. Take out the inner and outer pads on the caliper mounting plate, not forgetting the circular heat shield plate attached to the piston. Check the brake disc and then in case of machining, take the required steps to cut the disc and pads. Notice Before fitting the new pads, ensure that the guide pins insert freely in the body bushings of the caliper and lubricate them as required and clean the caliper and piston using brake system cleaner. Check the dust seal and piston, looking at them to see if they are damaged or have leaked, and replace the caliper, where necessary. To fit the new pads, insert a piston retraction tool or C-clamp to push the caliper piston into the cylinder to attach a brake bleeding tool to the caliper bleed screw. When using models with Teves/Ate calipers, cut the inner pad to fit the caliper piston, attach the outer pad to the mounting bracket, lubricate the pins of the caliper guide and push the caliper in place attaching the guide pins, which are tightened to the required torque. Install pad retaining spring and end caps and make sure that they are properly installed. In models that have Lucas calipers, the new pads should be inserted in the bracket, the caliper mounted over the pads and new mounting bolts fitted with these being tightened when the guide pins are held. Lastly, press the brake pedal several times till a firm touch is achieved, repeat the same to the other front brake caliper, attach the wheels and bolts, lower the car, and screw the bolts. Press the brake pedal several times so that it gets in touch with the disc and check the amount of brake fluid and test the brakes before getting the vehicle back on its normal service.
- Q: How to replace the front Brake Pad Set and ensure proper brake system maintenance on Volkswagen Rabbit?A:Take off the cap on the brake fluid reservoir and drain it off until about two-thirds of the fluid has been removed by cleaning the spilled fluid off instantly using clean and cold water to avoid any damage to the paint. Unscrew the bolts on the front wheel, lift up the front of the vehicle then hold it firmly on jackstands and block the other end. Take off the wheels and clean up one of the brake setups at a time cleaning the caliper and disc before disassembling them with brake system cleaner. Gently squeeze the piston back into the bore so as to allow the removal of the caliper and allow the new pads to fit, disconnect the electrical connector of the brake pad wear indicator and unclip the pad retaining spring. To remove the caliper guide pins, unscrew the end caps of the guide bushing, and then lift the caliper off the mounting bracket with the help of wire to eliminate the strain on the brake hose. Unscrew the inner pad of the caliper piston and pull out the outer pad of the mounting bracket. Check the brake disc and ensure that the guide pins slide easily in the caliper body bushings and lubricate with high-temperature brake grease that they are in good condition. Use a piston retraction tool or C-clamp to press the caliper piston back into the cylinder, to avoid the contamination of the hydraulic system attach a brake bleeding kit to the caliper bleed screw. Insert the inner pad into the caliper piston and the outer pad to the mounting bracket with the friction material facing the brake disc and the arrow of the outer pad facing the direction of rotation. Apply grease lubricating the caliper guide pins with brake grease that has high temperature, reattach them and screw them. Install end caps on the caliper guide pins and thereafter pad retaining spring is to be firmly attached. Install and reinstall the electrical connector of the brake pad wear indicator. Keep tapping the brake pedal until the pads touch the brake disc and a solid pedal feel has been reached then repeat it with the remaining front brake caliper. Fit the wheels and the wheel bolts, lower the vehicle and tighten the bolts to the required torque. Press the brake pedal several times firmly to make sure the pads are touching the disc, inspect the level of the brake fluid and add some more in case there is a need. Lastly, before resuming normal service put the brakes to the test.


Related Volkswagen Parts
 Volkswagen Starter
 Volkswagen Cup Holder
 Volkswagen Ambient Air Quality Sensors
 Volkswagen Axle Support Bushings
 Volkswagen Brake Drum
 Volkswagen Brake Dust Shield
 Volkswagen Car Bulbs
 Volkswagen Control Arm Bolt
 Volkswagen Fuel Tank Strap
 Volkswagen Shock Absorber
 Volkswagen Spark Plug Wire
 Volkswagen Steering Column Cover
Browse by Model
Arteon Brake Pad Set Atlas Brake Pad Set Atlas Cross Sport Brake Pad Set Beetle Brake Pad Set Cabrio Brake Pad Set Cabriolet Brake Pad Set CC Brake Pad Set Corrado Brake Pad Set e-Golf Brake Pad Set Eos Brake Pad Set EuroVan Brake Pad Set Fox Brake Pad Set Golf Alltrack Brake Pad Set Golf Brake Pad Set Golf R Brake Pad Set Golf SportWagen Brake Pad Set GTI Brake Pad Set ID.4 Brake Pad Set Jetta Brake Pad Set Passat Brake Pad Set Phaeton Brake Pad Set Quantum Brake Pad Set R32 Brake Pad Set Rabbit Brake Pad Set Rabbit Convertible Brake Pad Set Routan Brake Pad Set Scirocco Brake Pad Set Taos Brake Pad Set Tiguan Brake Pad Set Tiguan Limited Brake Pad Set Touareg Brake Pad Set Vanagon Brake Pad Set